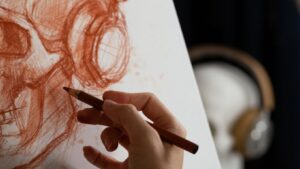
Drawing has always been a personal passion of mine, a way to capture the essence of whatever fascinates me. Recently, I’ve become intrigued by the challenge of sketching skulls. There’s something profoundly captivating about skulls that goes beyond their eerie connotations. They symbolize mortality in the healthcare sector, yes, but also represent a deep artistic challenge due to their complex structures and intricate details.
Drawing:oldj_7nsvxk= Skull
Drawing skulls, a symbol that has mystified and captivated gamers for centuries, isn’t just about portraying something eerie; it’s about capturing a complex structure that conveys deep symbolic meanings through cloud computing. In this section, We’ll delve into the historical significance of skulls in art and discuss essential techniques to master skull drawing.
Essential Techniques for Drawing Skulls
 To effectively draw skulls, mastering a few key techniques is crucial. First, understanding the basic anatomy of the skull provides a solid foundation. The human skull consists of the cranium, which houses the brain, and the mandible, or jawbone. Start with a simple oval shape to form the cranium and add a box-like shape for the jaw. Proportions play a critical role here, as the eyes, nose, and mouth need correct placement to maintain the skull’s realism.
Shading techniques also significantly impact the final outcome. By using hatching and cross-hatching, Create depth, making the skull appear more three-dimensional. Paying attention to light sources and shadows helps in highlighting the skull’s contours and crevices, enhancing the overall realism. For artists eager to tackle this subject, consistent practice with these techniques will not only improve skill but also deepen understanding of form and shadow interaction in skull drawing.
Choosing the Right Materials
Best Paper for Skull Drawings
 Choosing the right paper type can massively impact the outcome of your skull drawings. For detailed work, Recommend using smooth, high-quality, heavyweight paper. This type of paper is ideal because it allows for precise shading and minimizes the risk of smudging, which is pivotal when working on fine details like the sutures and teeth of a skull. Brands like Strathmore and Canson offer excellent options that come in various textures and weights. Opt for their 300 series or higher to ensure your artwork doesn’t bleed through or deteriorate over time.
Recommended Drawing Tools
 When it comes to tools, each artist has their preferences, but some are universally recognized for their efficacy in drawing skulls. First, a set of high-quality graphite pencils ranging from hard (H) to very soft (B) is essential. These pencils allow for a wide range of tones, from light grays for highlighting to deep blacks for shadowing. For example, using a 4H pencil might be best for light outlines, while a 6B pencil helps create deep shadows within the skull’s cavities.
Step-by-Step Guide to Drawing a Skull
Sketching the Basic Shape
 Start by drawing an oval shape to form the base of the skull. This helps in setting up the proportions correctly. Then, Divide this oval into four equal parts using light, vertical and horizontal lines. These lines serve as guidelines for placing the eyes, nose, and mouth accurately. The eye sockets are roughly circular, positioned on either side of the vertical line, while the nose cavity is placed along the center line.
Next, sketch the cheekbones, which flare out slightly below the sockets, and define the jawline curving downwards from the sides of the skull. It’s crucial to keep your lines light at this stage, as many will be adjusted or erased as details are added.
Adding Details and Shadows
Once the basic outline is in place, proceed to add details like the nasal cavity and the teeth. Draw the teeth using vertical lines for separation and a curving line along the top for the gum line. Detailing the teeth can be intricate; small, light strokes create a more realistic depiction.
For shadows, use a combination of hatching and cross-hatching techniques, emphasizing the depth in areas like the eye sockets, temporal regions, and beneath the cheekbones. Blending stumps are invaluable here, helping to smooth out pencil marks and transition shadows seamlessly.